If you’re a regular reader of our blogs, you probably know by now how much we love edibles—as evidenced here, here, and here. The reason our love runs so deep is because when it comes to managing chronic pain, consuming cannabis and having it metabolized by the liver, rather than through the bloodstream, creates a long-lasting and incredibly effective analgesic (a substance that relieves pain). This is especially important for patients suffering from chronic pain, as they can use less cannabis but still feel lasting effects.
Please note that while edibles are still illegal to purchase in PA and other states with MMJ programs, you probably have all the tools you need to create something delicious and effective in the comfort of your own kitchen.
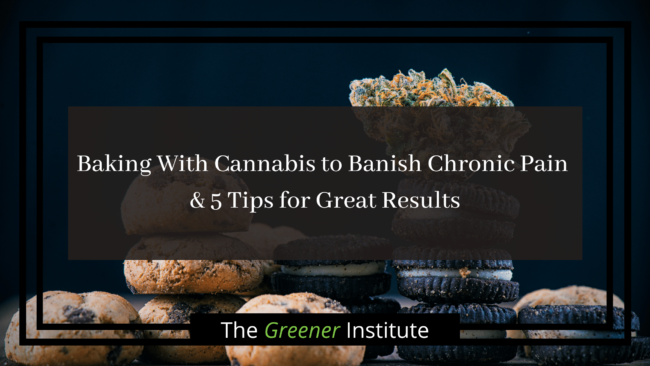
If you’re still apprehensive about edibles—which is understandable given how they’re represented in popular culture—let us convince you to give them a try! In this blog, we’ll talk about the benefits of edibles for chronic pain and provide baking tips so you always get great results!
Why You Should Bake With Cannabis
As mentioned above, one of the reasons edibles are so highly recommended by us, and many others, for treating chronic pain is due to how they are processed by the body. When you consume cannabis by way of combustion (smoking) or vaping, the cannabinoids are processed almost immediately through the bloodstream. This results in a fast high and quick pain relief, sure, but the effects are relatively short lived.
Comparatively, when you consume cannabis, by way of tinctures, sublinguals, or edibles, the body breaks down the substance through the liver before entering the bloodstream. It is metabolized slowly, over time, which can make the effects take longer to appear but it also ensures that the results are long-lived.
While the way the body breaks down cannabis will vary from person to person, depending on age, weight, height, general health, and previous exposure to the substance, current research has been able to provide estimates of how long each delivery method lasts in our system.
According to 420 Tours, concentrates will create a high that lasts for approximately half an hour to two hours, flower will last for about an hour or two, and the high from edibles will last nearly four to six hours. Though these are just estimates, it is clear to see that edibles are far superior when it comes to the length of the high. With this information, it’s clear to see the advantages edibles have when it comes to treating chronic pain.
6 Tips for Baking With Cannabis
If we’ve succeeded in convincing you to give edibles a shot, you’ll need to understand the basics of making cannabis-infused goods and treats! While it may seem complicated at the outset, once you have the rhythm and fundamentals down you’ll see that it’s just as easy as regular baking! Please note that we have included tips that will help you make cannabutter—a substance that can be used to replace regular butter in your favorite recipes and make them infused.
Here are six tips that can help you thrive when baking with cannabis:
Tip 1: Have the Right Tools & Ingredients
As per anything you cook, you need to make sure you have the right tools and ingredients. When it comes to baking with cannabis, you may assume the only ingredient that truly matters is the strain you use. This, however, could not be further from the truth. In reality, to make something special, you should focus on your other ingredients. You’re not going to taste the cannabis in your bakes if you do it right, so prioritizing the ingredients that affect taste is your best bet.
This is what you’ll need, ingredients wise, for a majority of cannabis bakes:
- Eggs, at least six
- Unsalted butter, at least two sticks, OR your preferred oil of choice (coconut, avocado, etc)
- Vanilla extract
- All-purpose flour
- Salt, preferably kosher
- Baking powder
- Quality chocolate (if baking brownies)
Here are the tools you’ll need to have on hand:
- A baking pan and cookie sheet
- Parchment paper
- Weed grinder
- Wooden spoon
- Cheesecloth
- Two large pots
This may seem like a lot of tools and ingredients, but you most likely have a majority of these items in your kitchen already. What you don’t have, you can find at your local head shop (a grinder) or your local grocery store (basically everything else, including cheesecloth).
Tip 2: Picking the Right Strain
Even though we just wrote that the strain matters less than the other ingredients in a bake, you’ll still want to make sure you use a strain you enjoy or one that will give you the desired effect. If you want maximum pain relief to help you sleep through the night, opt for an indica-dominant strain. If the adverse is true and you need something to eat in the morning to help you get up and at ‘em, go for a sativa. If sativas can make you feel a bit anxious, try a hybrid!
Regardless of what you go for, we recommend you use a strain that is tried and true for you to ensure you’ll get the best result possible—and so that your bake doesn’t go to waste if the effect isn’t enjoyable.
Tip 3: Finding the Right Dose
Perhaps the most challenging aspect of making your own edibles, dosing at home through edibles can be rather inexact. However, there are certain guides you can use to ensure you don’t overdo it. We love this helpful explanation from The Cannabist when it comes to determining dosage:
Every 1 gram of cannabis bud has 1,000mg of dry weight. If a strain has about 10 percent THC, 10 percent of 1,000mg would be 100mg. So for cooking or baking at home, it’s safe to assume that a gram of cannabis contains at least 100mg of THC.
With that in mind, the amount of milligrams you decarb (see more below) should be divided by the number of servings in the dish you’re making. States that allow edibles usually cap THC per edible to 10mg, which is a good and safe guideline to follow.
Tip 4: Become a Pro at Decarboxylation
Despite it’s science-y name, decarboxylation isn’t anything to fear or be overwhelmed by. In short, decarbing cannabis is the process that activates THC in the flower. Raw weed isn’t psychoactive, though it is full of essential oils, vitamins, and acids, so you’ll need to heat it up to make sure you harvest all the beneficial aspects of the plant.
Every edible, whether it be a brownie or a gummy, starts with decarboxylation. You can complete this process in your kitchen with minimal effort. Follow these four easy steps for great results:
- Preheat the oven to 240℉.
- Tear the flower into “bite-size” pieces. Make sure each nugget is relatively even in size to ensure even baking and don’t overcrowd the baking sheet.
- Place the flower in the oven and bake for 30 to 40 minutes, checking every few minutes until the flower becomes a golden brown color.
- Remove the baking sheet from the oven and let cool. Once cool, grind the cannabis to a coarse texture in batches using your grinder.
Tip 5: Time to Infuse
After activating the cannabinoids in the flower through decarboxylation, it’s time to infuse the cannabis into butter, creating “cannabutter.” While there are plenty of other ways to infuse cannabis into baked goods, cannabutter is one of the most versatile ways to do so since most bakes will require butter. Here’s how to turn your decarbed flower into cannabutter:
- Bring a quart of water to boil in a medium saucepan.
- Once boiling, add the sticks of butter to the water. Though it may seem strange, the addition of water will help regulate the temperature and keep the butter from burning.
- Once the butter is fully melted, stir in your decarbed cannabis and reduce the heat to a simmer. The weed should be floating approximately 1.5 to 2 inches from the bottom of the pan at all times.
- Cook the butter and flower on low heat for about three hours, or until it becomes thick at the top.
- Once thickened, pour the butter mixture into a bowl lined with cheesecloth. Use the cheesecloth to squeeze out the remaining liquid butter.
- Cool the cannabutter for an hour at room temperature before transferring it to an airtight container and storing in the fridge where it will harden and become a spreadable consistency.
- Once refrigerated, if you notice excess water has pooled at the bottom of the jar, use a spoon or knife to remove the solid cannabutter and drain the water. This is only possible after letting the cannabutter cool for at least an hour.
Once you’ve successfully infused your butter, you’re all set to bake! Simply replace regular butter with the cannabutter in your recipe of choice! Be aware, as well, that you are not limited to baked goods, regardless of the title of this blog—you can use cannabutter in sweet and savory recipes.
Some Final Thoughts
Is making your own edibles a rather time-consuming process? Yes, we won’t lie to you. However, you can make cannabutter in large batches all at once and then store it in the fridge for a few weeks. Though you may have to devote a few hours to the process, you’ll have cannabis-infused treats that are both delicious and incredibly effective at battling chronic pain.
If you have any further questions about cooking or baking with cannabis, we’d be happy to help! Simply give us a call at 833-888-5323 or use the chat feature at the bottom right and we’ll help you figure it out!
Are you in need of a medical marijuana card? If so, we can also help you! If you’re a PA resident seeking a card, schedule an appointment here. For Maryland residents, you can schedule your appointment at this link.